A night vision scope is only as effective as its zero. Even the most advanced optic cannot deliver accurate shots if the point of aim does not match the point of impact. Unlike traditional daytime scopes, zeroing a night vision scope comes with a few extra considerations. The electronic display, digital zoom, and infrared illumination all influence how you approach the process. Fortunately, the basic principles remain straightforward once you understand the proper steps.
This guide explains how to zero a night vision scope from start to finish, helping you achieve consistent accuracy while avoiding the common mistakes that often frustrate first-time users.
Understand What Zeroing Means
Zeroing is the process of aligning your scope’s reticle with where your rifle’s bullets actually strike. Once properly zeroed, placing the reticle on your target should result in the bullet impacting that exact point at your chosen distance.
For example, if you choose a 100-yard zero, your rifle should consistently hit the center of the target when the reticle is held on the center at 100 yards.
Without a proper zero, even the best ammunition and shooting technique cannot compensate for an incorrectly adjusted optic.
Gather the Right Equipment
Before heading to the range, make sure you have everything you need.
Essential items include:
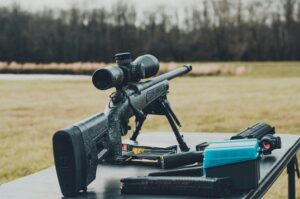
- Your rifle with the night vision scope securely mounted
- Stable shooting bench
- Rifle rest or bipod with rear shooting bag
- Targets with high-contrast aiming points
- Ammunition you plan to use regularly
- Fresh batteries for the scope
- Measuring tape or rangefinder
- Small notebook for recording adjustments
Using the same ammunition you’ll hunt or shoot with later is important because different bullet weights and loads often produce different points of impact.
Secure the Scope Properly
A loose scope will never hold zero consistently.
Before firing your first shot, verify that:
- The scope rings are tightened to the manufacturer’s recommended torque.
- The mounting base is secure.
- Nothing shifts when pressure is applied.
- Eye relief is comfortable in your normal shooting position.
If the scope moves even slightly under recoil, you’ll constantly chase your zero without ever achieving consistent results.
Start During Daylight if Possible
Many people assume a night vision scope must be zeroed at night. While nighttime confirmation is useful, daylight zeroing is often easier.
Most digital night vision scopes function during the day by reducing light entering the sensor or using dedicated daytime modes. Better visibility makes it easier to see your target, evaluate your groups, and make precise adjustments.
If your scope manufacturer approves daytime operation, take advantage of it.
Choose the Right Zero Distance
The ideal zero distance depends on how you intend to use your rifle.
Common choices include:
- 50 yards: Ideal for short-range pest control and thick cover.
- 100 yards: The most popular all-around zero for hunting.
- 200 yards: Better suited for open terrain where longer shots are common.
A 100-yard zero provides an excellent balance for most night hunting situations because many nighttime shots occur well within this range.
Use a Stable Shooting Position
Accuracy begins with consistency.
Shoot from a solid bench whenever possible using a quality front rest or bipod combined with a rear shooting bag. Your goal is to eliminate as much human movement as possible so any bullet deviation reflects the rifle rather than the shooter.
Avoid zeroing from standing, kneeling, or unsupported positions.
Bore Sight Before Firing
Bore sighting helps get your first shots on paper and saves both ammunition and time.
With bolt-action rifles, remove the bolt and look through the bore at a target placed approximately 25 yards away. Without moving the rifle, adjust the scope until the reticle rests on the same point visible through the barrel.
If your rifle design doesn’t allow manual bore sighting, a laser bore sighter can perform the same job.
Bore sighting does not replace actual zeroing, but it provides an excellent starting point.
Fire Your First Three-Shot Group
Rather than adjusting after every shot, fire a controlled three-shot group.
A three-shot group reveals your rifle’s true point of impact while minimizing the effect of an occasional flyer caused by shooter error.
Aim at exactly the same point for each shot and avoid rushing between rounds.
Measure the Point of Impact
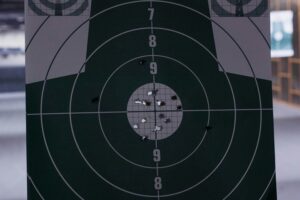
After shooting your group, determine how far the center of the group sits from your aiming point.
Measure:
- Horizontal distance (left or right)
- Vertical distance (high or low)
Always measure from the center of the group rather than focusing on individual bullet holes.
Adjust the Scope Correctly
Most digital night vision scopes use electronic adjustment menus rather than traditional adjustment turrets.
Follow your scope’s adjustment procedure carefully.
Each adjustment moves the reticle toward the bullet impact or moves the electronic point of aim, depending on the scope’s design.
After making corrections, save the adjustments if your scope requires confirmation before exiting the menu.
Fire Another Group
Repeat the shooting process after making adjustments.
Continue firing three-shot groups until the center of the group matches your chosen aiming point.
Avoid making large corrections based on a single shot, as this often leads to over-adjustment.
Confirm at Your Intended Hunting Distance
Once your rifle is zeroed at your primary distance, verify its performance at additional ranges.
For example:
- 50 yards
- 100 yards
- 150 yards
- 200 yards
Understanding your bullet’s trajectory helps you make accurate shots when game appears closer or farther than your zero distance.
Test at Night
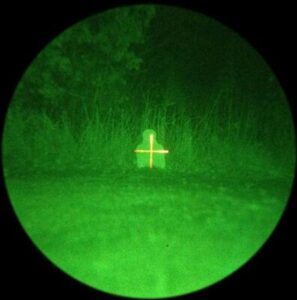
Even if you completed the initial zero during daylight, perform a final confirmation after dark.
Nighttime conditions introduce factors such as:
- Infrared illumination
- Reduced target contrast
- Different background lighting
- Changes in depth perception
Fire another group using the same infrared illuminator and brightness settings you plan to use while hunting.
This final confirmation ensures your rifle performs exactly as expected in real-world conditions.
Save Multiple Zero Profiles if Available
Many modern digital night vision scopes allow users to save several rifle profiles.
This feature is especially useful if you:
- Own multiple rifles
- Use different calibers
- Switch between various ammunition loads
- Install the scope on different firearms
Saving separate profiles eliminates the need to re-zero every time you change rifles.
Record Your Zero Information
Keeping detailed notes saves time later.
Record:
- Zero distance
- Ammunition brand
- Bullet weight
- Date
- Weather conditions
- Scope profile used
These records make it much easier to recreate a successful setup if you ever reset your scope.
Check Your Zero Regularly
A properly mounted quality night vision scope usually maintains zero well, but it’s still wise to verify accuracy periodically.
Always confirm your zero after:
- Transporting the rifle long distances
- Removing and reinstalling the scope
- Hard impacts or drops
- Changing ammunition
- Significant maintenance work
A quick confirmation group provides confidence before heading into the field.
Common Mistakes to Avoid
Several simple errors can make zeroing far more difficult than necessary.
Avoid these common mistakes:
- Using different ammunition during zeroing and hunting
- Adjusting the scope after every shot instead of after groups
- Zeroing from an unstable position
- Forgetting to save electronic adjustments
- Ignoring loose mounting hardware
- Skipping a nighttime confirmation
- Using nearly depleted batteries
Preventing these issues results in a faster, more reliable zero.
Final Thoughts
Learning how to zero a night vision scope is an essential skill for anyone who relies on accurate shooting after dark. While digital optics include features that differ from traditional scopes, the goal remains the same: aligning your point of aim with your point of impact. By using a stable shooting position, firing consistent groups, making measured adjustments, and confirming your results in the same conditions you’ll be shooting in, you can build confidence in both your equipment and your marksmanship. A carefully zeroed night vision scope not only improves accuracy but also increases the likelihood of clean, ethical shots whenever the opportunity presents itself.
Related